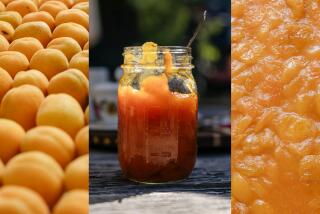
Fruit, Sugar and a Little Bit of Time
“Nobody makes jam at home anymore except for shut-ins and little old ladies,” a long-ago editor once told me. I was thinking about that Sunday as I whipped up a mess of strawberry preserves after breakfast, in between going to the farmers market and getting ready to watch the Lakers.
Granted, home preserving has an image about as hip and sexy as a gingham apron. But hip and sexy is a passing pleasure, especially when compared with the flavor of a spoonful of my strawberry preserves smeared on a piece of hot buttered toast in the morning. And don’t even get me started on my elephant heart plum or nectarine-and-rose geranium jams.
It is surprising that in this do-it-yourself world of cooking, where people brag about making their own bread, fresh pasta and chicken stock, that jam making is still so little regarded. That’s especially true considering this technique--it makes creating your own jams and preserves about as complicated as cooking a quick pasta for dinner.
Here’s what you’ll need: a big pot, a nonstick skillet and a scale. Oh, and fruit. But just a little bit.
The problem with most preserving is that it requires such large quantities. This does have the advantage of making enough jelly to hold you through a hard Midwestern winter. However, that is outweighed by the finger cramps you get when paring a bushel of fruit, the amount of time required to cook all of it, and the sheer uncertainty involved when preparing jams in such large batches (Is it done now? Now? Now?).
But when you make jam in small amounts like this, you can do it almost spontaneously. A couple of pints of strawberries will turn into four or five jars of jam in less than 20 minutes of cooking time. There’s an overnight sit involved beforehand--to let the sugar pull all that sweet juice out of the fruit--but how much trouble is that?
I first tried this a couple of years ago after a suggestion by a friend, cookbook author Sylvia Thompson. First one batch, then another. Just about every time I went to the market, I’d come back with a couple of pounds of something to turn into jam.
Here’s how it goes (this basic technique will work with everything from strawberries and mulberries to peaches and plums): Wash the fruit and cut it up in bite-size pieces. Weigh it and put it in a pot with an equal weight of sugar.
Bring this to a boil and stir until the juices are clear, then set it aside for several hours or overnight. Ladle a couple of cups’ worth of fruit into a skillet and bring it to a boil again. Cook until the mixture has set--this will take five minutes or less--and you’re done.
If you’ve been troubled in the past by difficulty in telling when jam has jelled, this method is much easier. When you’re working with only two cups of fruit, you can tell by the feel when the mixture has set. Suddenly, it’s thicker and smoother when you’re stirring.
As a long-time preserver, I am still startled that it cooks so quickly. In fact, the first batch usually winds up slightly overcooked. (“Let’s go a little longer, it can’t be done already!” But it is.)
To make certain the mixture is cooked, lift your spatula: When the mixture no longer flows from the side at one point, the way liquids do, but begins to come off in multiple points or sheets, it’s done.
Or use the plate test: Chill a plate in the freezer for 10 minutes, and when you think the jam is ready, spoon a drop of liquid onto the plate. If it doesn’t run, you’re done.
You’ll notice that the texture of this jam is a little different than what you may be used to. It’ll be softer, spoonable. That’s because it’s made without artificial pectin and with less sugar. Adding pectin makes jam-making easy, but it also results in a very firm set. It also requires a certain percentage of sugar to work right--more than I like to use.
In fact, according to the Food and Drug Administration, you can’t really call this a jam. The FDA regulations on product identity require a jam, jelly or preserve to contain at least 65% sugar. This jam is only 50% and can be made with even less. That leaves it with a much fresher taste and a brighter color.
If you want to can the jams so you can store them without refrigeration, you’ll need another 15 minutes of work. Despite the mystique surrounding it, canning isn’t hard. The main thing is making sure everything you use is sterilized--easy enough to do when one of the requirements is a big pot of boiling water.
Boil the jars and lids for five minutes and you’re ready to go. Ladle the jam mixture into the jars (a wide-mouth canning funnel isn’t necessary but will certainly make cleanup a lot easier). Put the lids on top and tighten down the bands. Now put the jars in the boiling water, making sure they’re completely submerged. (If you have a pasta insert, the deep basket that comes with a pasta pot, you can add the jars and remove them much more easily.) Cook 10 minutes and then lift the jars from the bath. That’s about it.
After a couple of hours, check to make sure you’ve got good seals (the merry pinging you should hear during the cool-down will be the lids popping from the vacuum forming). Press down firmly in the center of each lid; there shouldn’t be any flex. If the lid flexes, repeat the canning process.
But canning is really not necessary when you’re making this little jam at a time. You can easily store the four or five jars in the refrigerator. They’ll last a couple of weeks and then you’ll be ready to make some more.
*
Strawberry Preserves
Active Work and Total Preparation Time: 30 minutes plus 8 hours standing
This recipe works best with weights (how would you know if you were a few strawberries short of a pint?). Use equal amounts of fruit and sugar. We’ve listed approximate volume measures if you don’t have a scale (2 pints of strawberries weigh about 2 pounds.)
2 pounds washed and hulled strawberries, cut into bite-size pieces (about 8 cups)
2 pounds sugar (about 4 cups)
Juice of 1 lemon
Combine the strawberries and sugar in a large pot and heat slowly until the juices are clear, about 5 minutes. Remove from the heat and stir in the lemon juice, then cover loosely and let stand overnight.
The next day, get everything ready for canning: Bring a large pot of water to a boil and sterilize 5 sets of jars and lids, about 5 minutes. Turn off the heat, but leave the jars and lids in the hot water until you’re ready to use them.
Heat 2 cups of the strawberries and juice in a 10-inch nonstick skillet over medium-high heat. When the strawberries start to simmer, cook, stirring often, until the preserves test done, 3 to 5 minutes. Ladle the jam into the sterilized jars, filling to within 1/4 inch of the rim. Cover with the lid and fasten the ring tight.
Set aside and repeat with the remaining strawberries and juice.
To complete the seal, bring the large pot of water back to a boil, place the covered jars in a pasta insert and place them in the pot. Make sure the boiling water covers the jars. Cook 5 minutes.
Remove the jars from the pan and set aside to cool. After 30 minutes, check the lids to make sure they’ve sealed tightly. Gently press down in the center of the lid; if it does not spring back, you have a tight seal.
Repeat the canning process with any jars that have not sealed tightly.
5 (8-ounce) jars. Each tablespoon: 41 calories; 0 sodium; 0 cholesterol; 0 fat; 0 grams saturated fat; 10 carbohydrates; 0 protein; 0.35 gram fiber.
More to Read
Eat your way across L.A.
Get our weekly Tasting Notes newsletter for reviews, news and more.
You may occasionally receive promotional content from the Los Angeles Times.


